
V.J.A.I (Short for Visual Jockey Artificial Intelligence) is a hardware & software instrument built for independent house/techno DJs to generate real-time Al visuals that react live to the music being played.
DJs want immersive experiences, but VJ software demands hours of preparation, hiring a VJ is expensive, and running both DJ and VJ software simultaneously is overwhelming.
VJAI was built to solve all three at once and to reflect a belief that performance tools should lower barriers without lowering the ceiling, giving DJs creative control over their visual identity without pulling focus from the music itself.
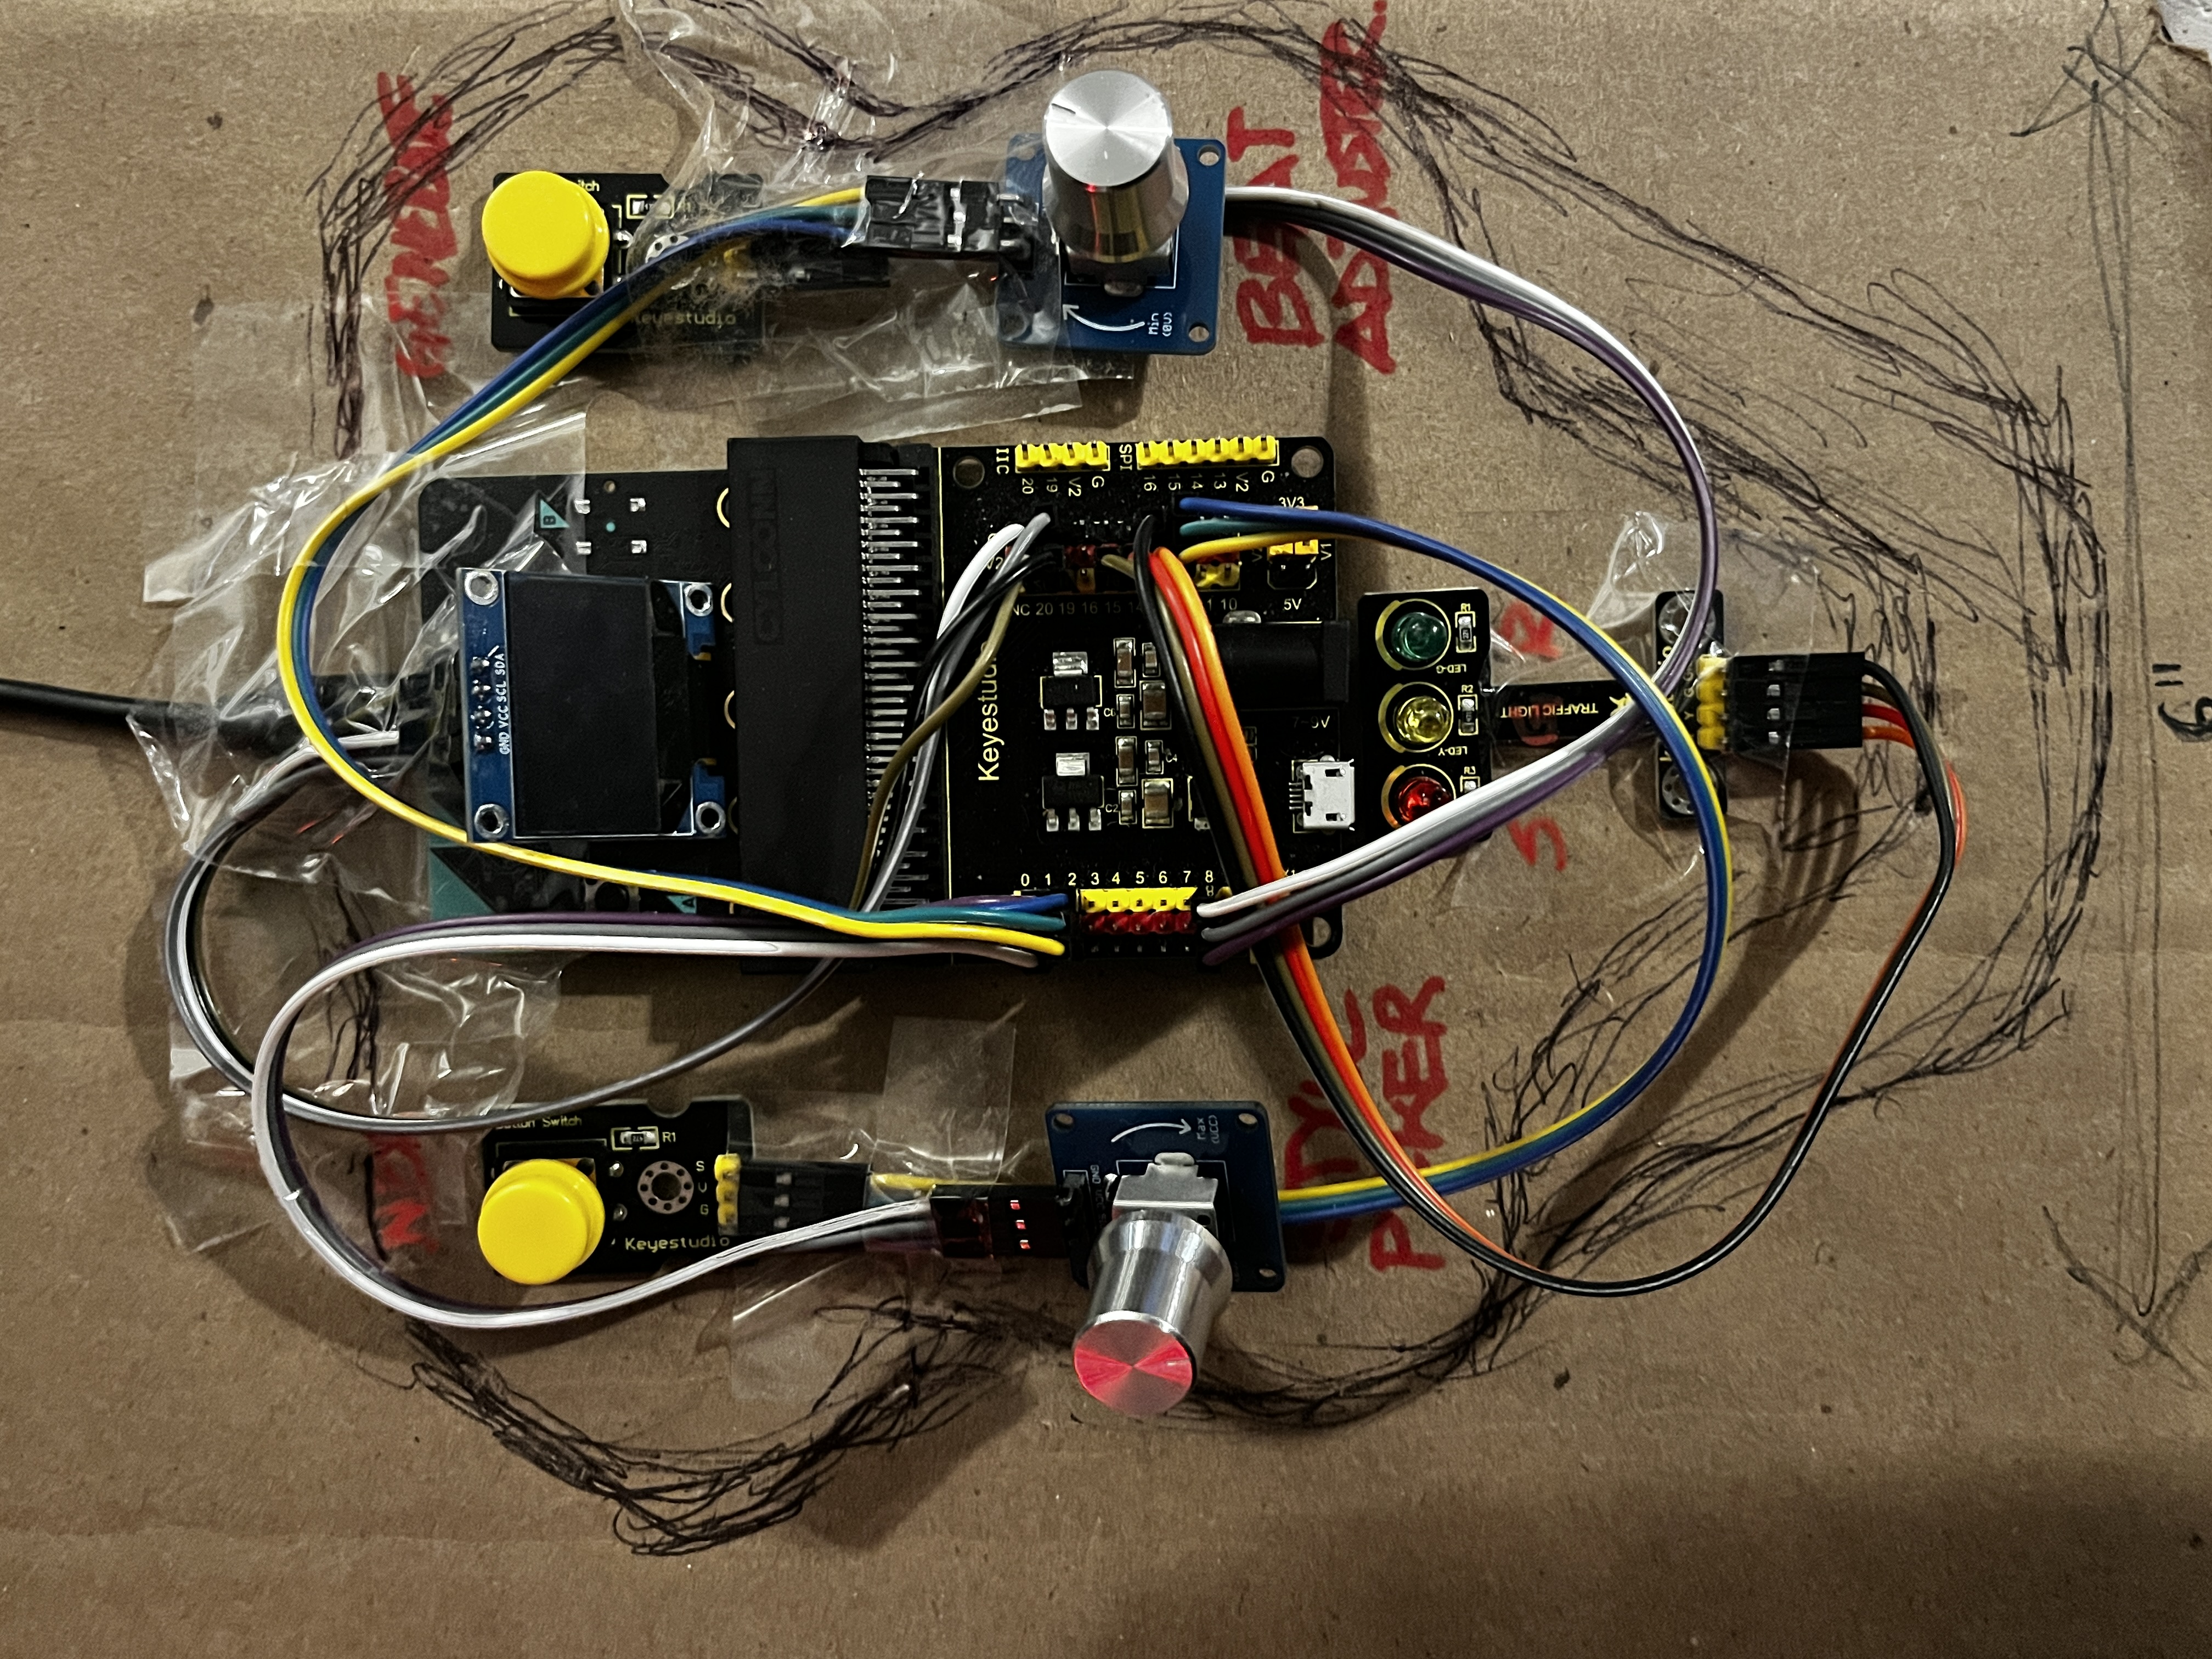
Initial Prototype: Using a Micro:bit for the hardware and mapping out functions.
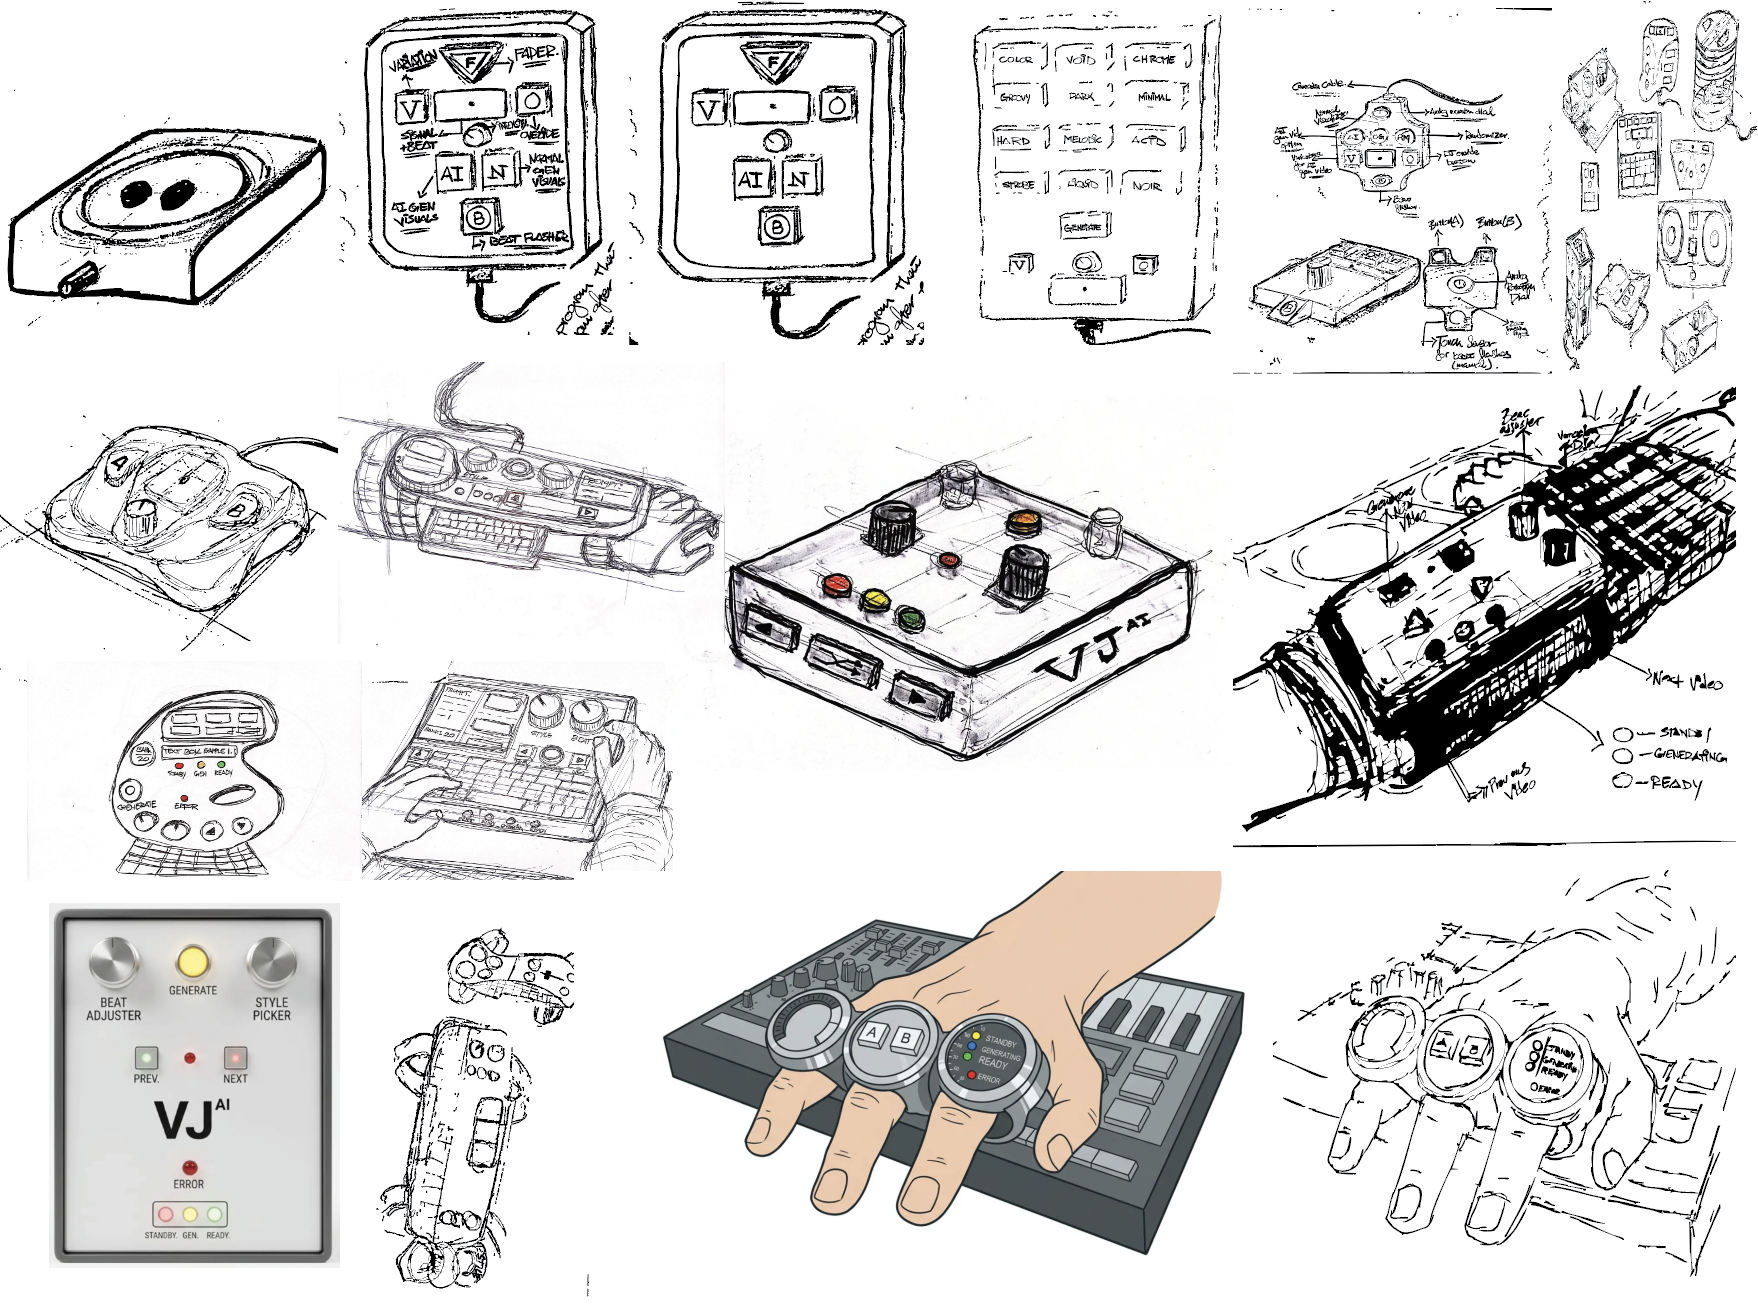
Early Sketching & Visualization: The process was mainly hand sketching and I visualized using Vizcom.
The top left image was the first sketch I did, minimal with very few buttons. I kept an open mind and started sketching more ways to interact with the proposed solution.
The middle sketch was what felt right and the bottom left was the visualization from another sketch that made sense as well, so decided to move with that language in mind.
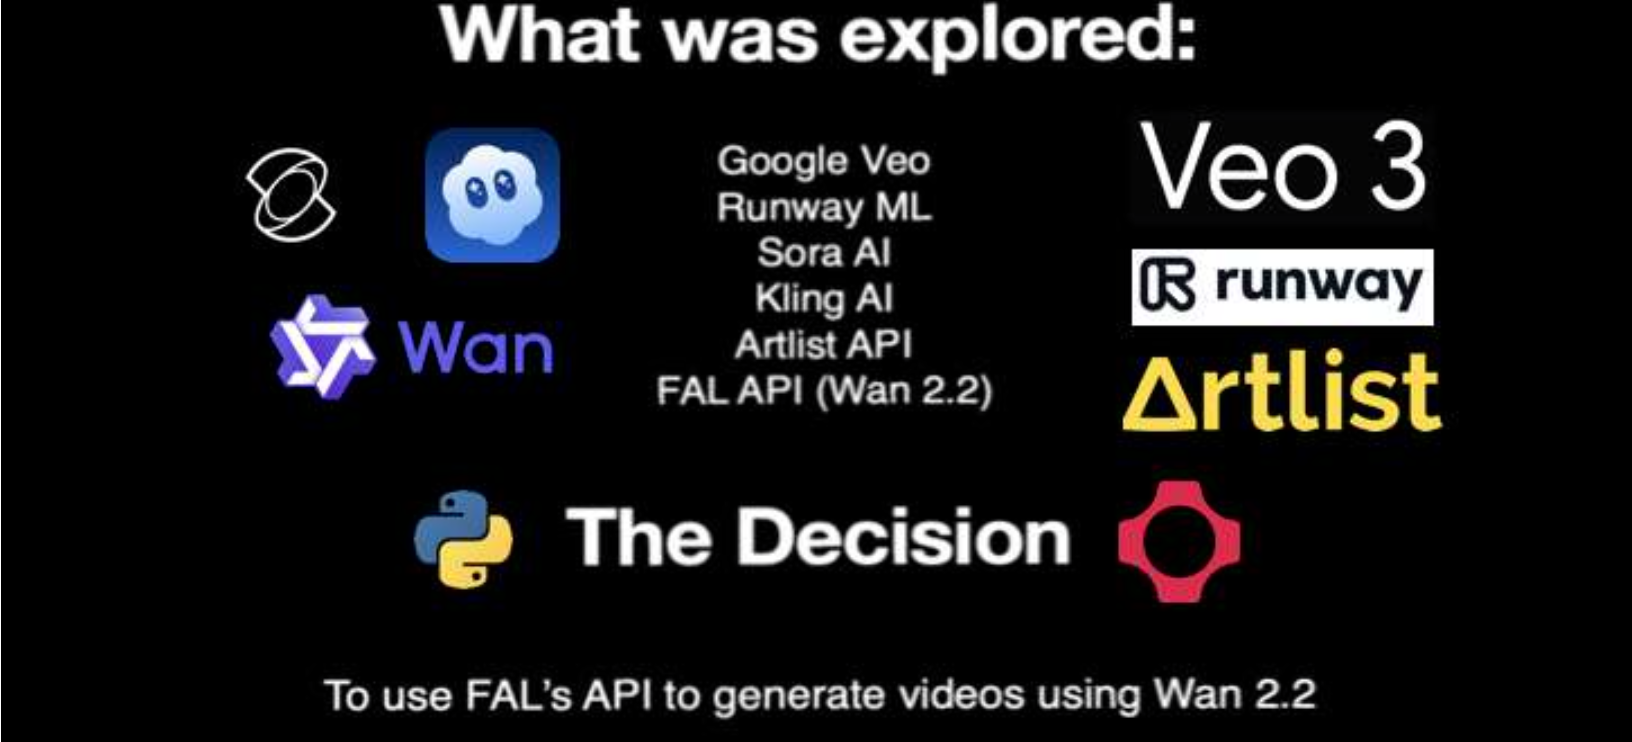
AI Video Generation: To find out the best and cost effective and cost efficient way to generate AI videos, I explored multiple, as Google Veo was too expensive ($8 per video) Runway ML was unreliable for live video generation, Sora felt too sloppy, Kling AI was okay but not good enough, Artlist API was too expensive as well and through FAL API I found Wan 2.2 and that was the best fit.
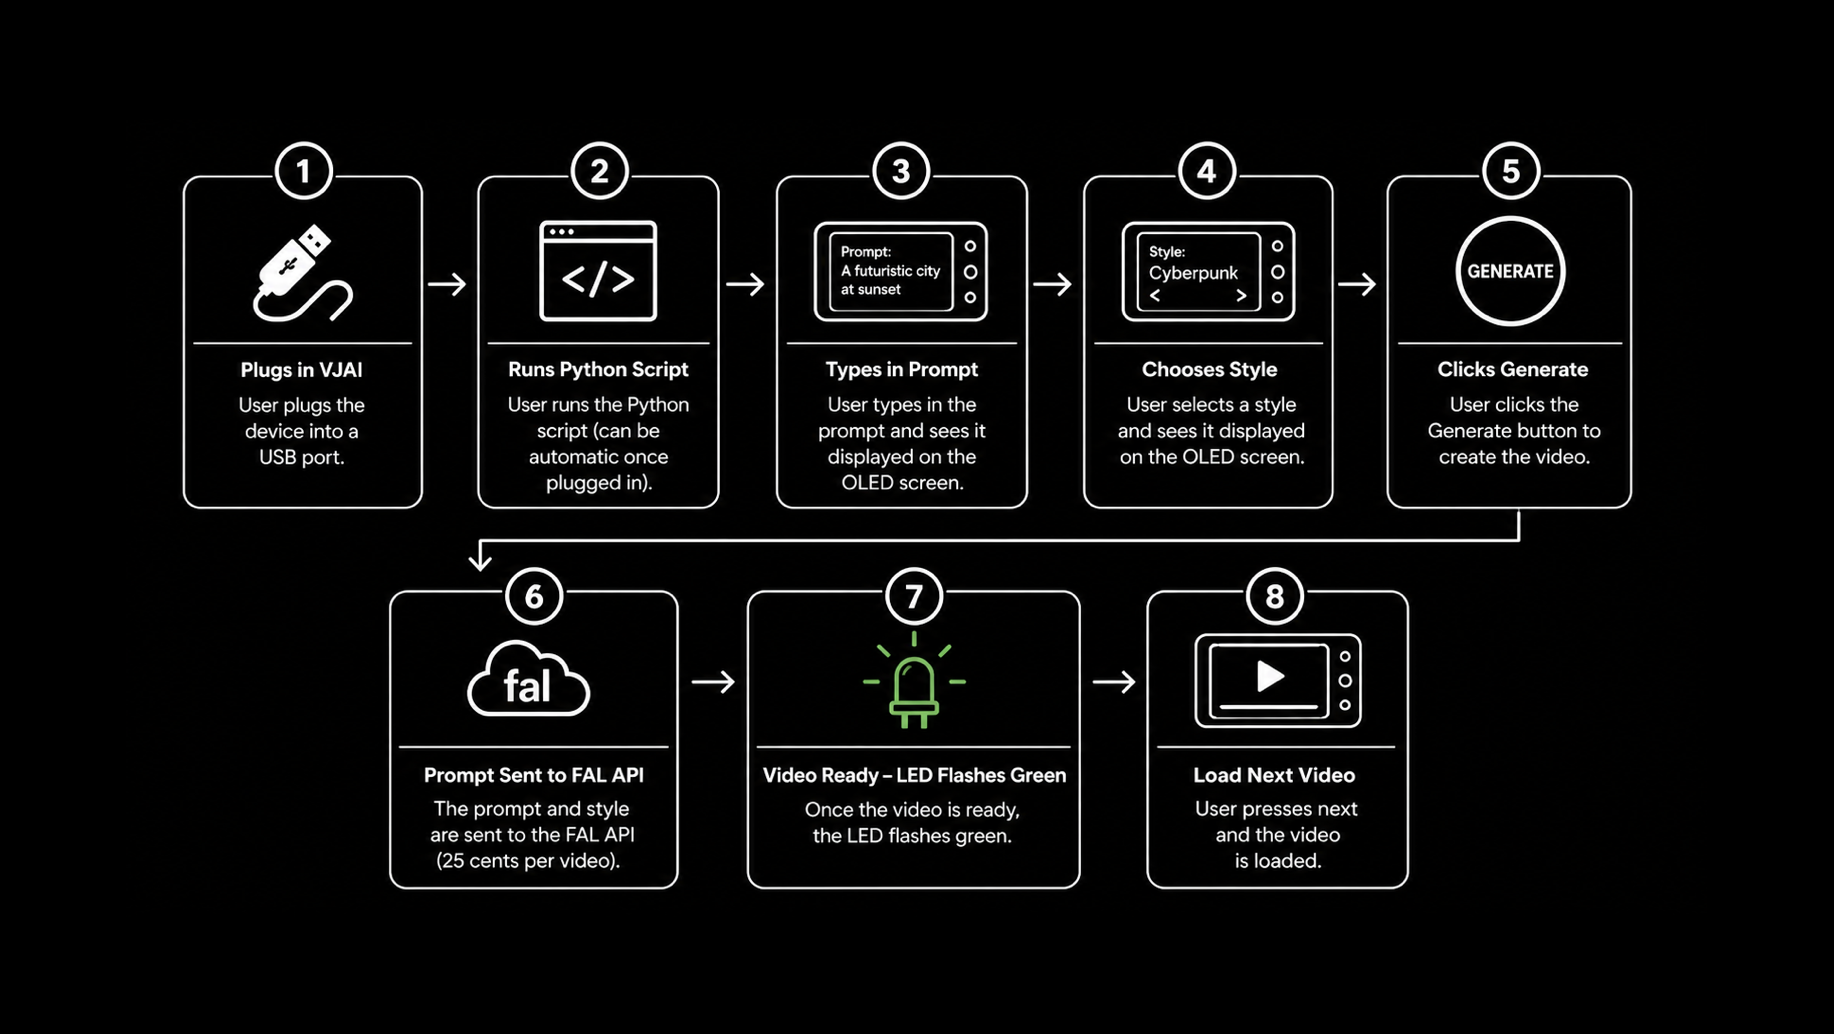
User Journey: Mapping out how the user would interact with V.J.A.I as the first prototype.
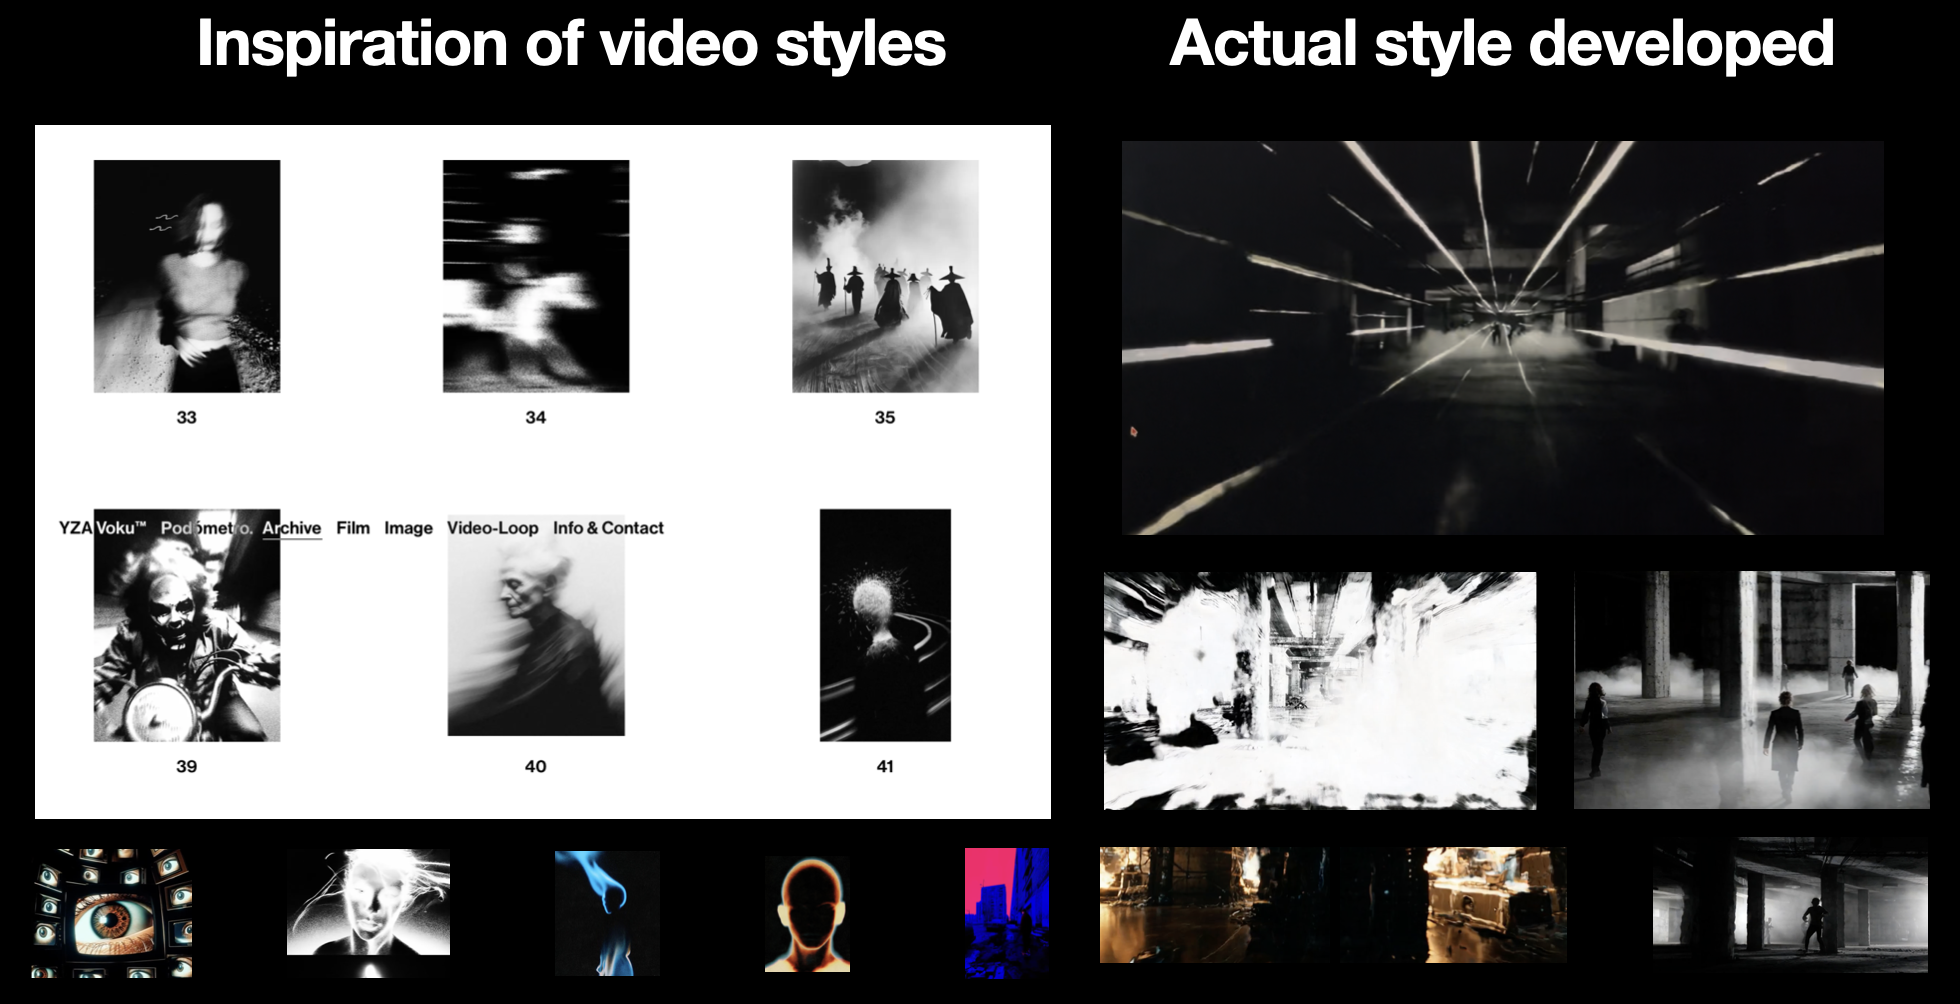
Video Styles: The main inspiration for how the visual style of the video would be is through an artist called YZAVoku, an AI visual artist and Director (https://www.yzavoku.com).
By using WAN 2.2 AI video generation, I was able to achieve that style.
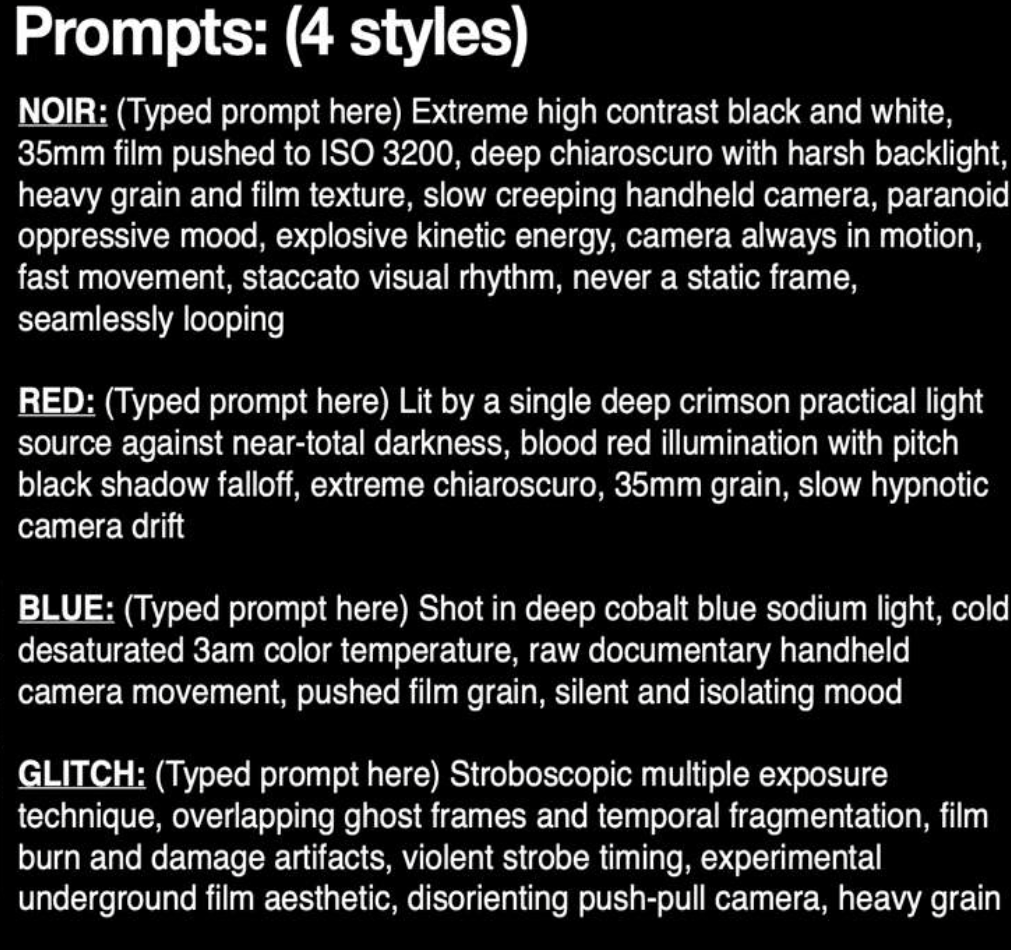
Prompts: Attached to each style on the hardware is a prompt that is sent to WAN 2.2, the user only types in what they want and whatever the user types is attached to a prompt in respect to the style chosen.
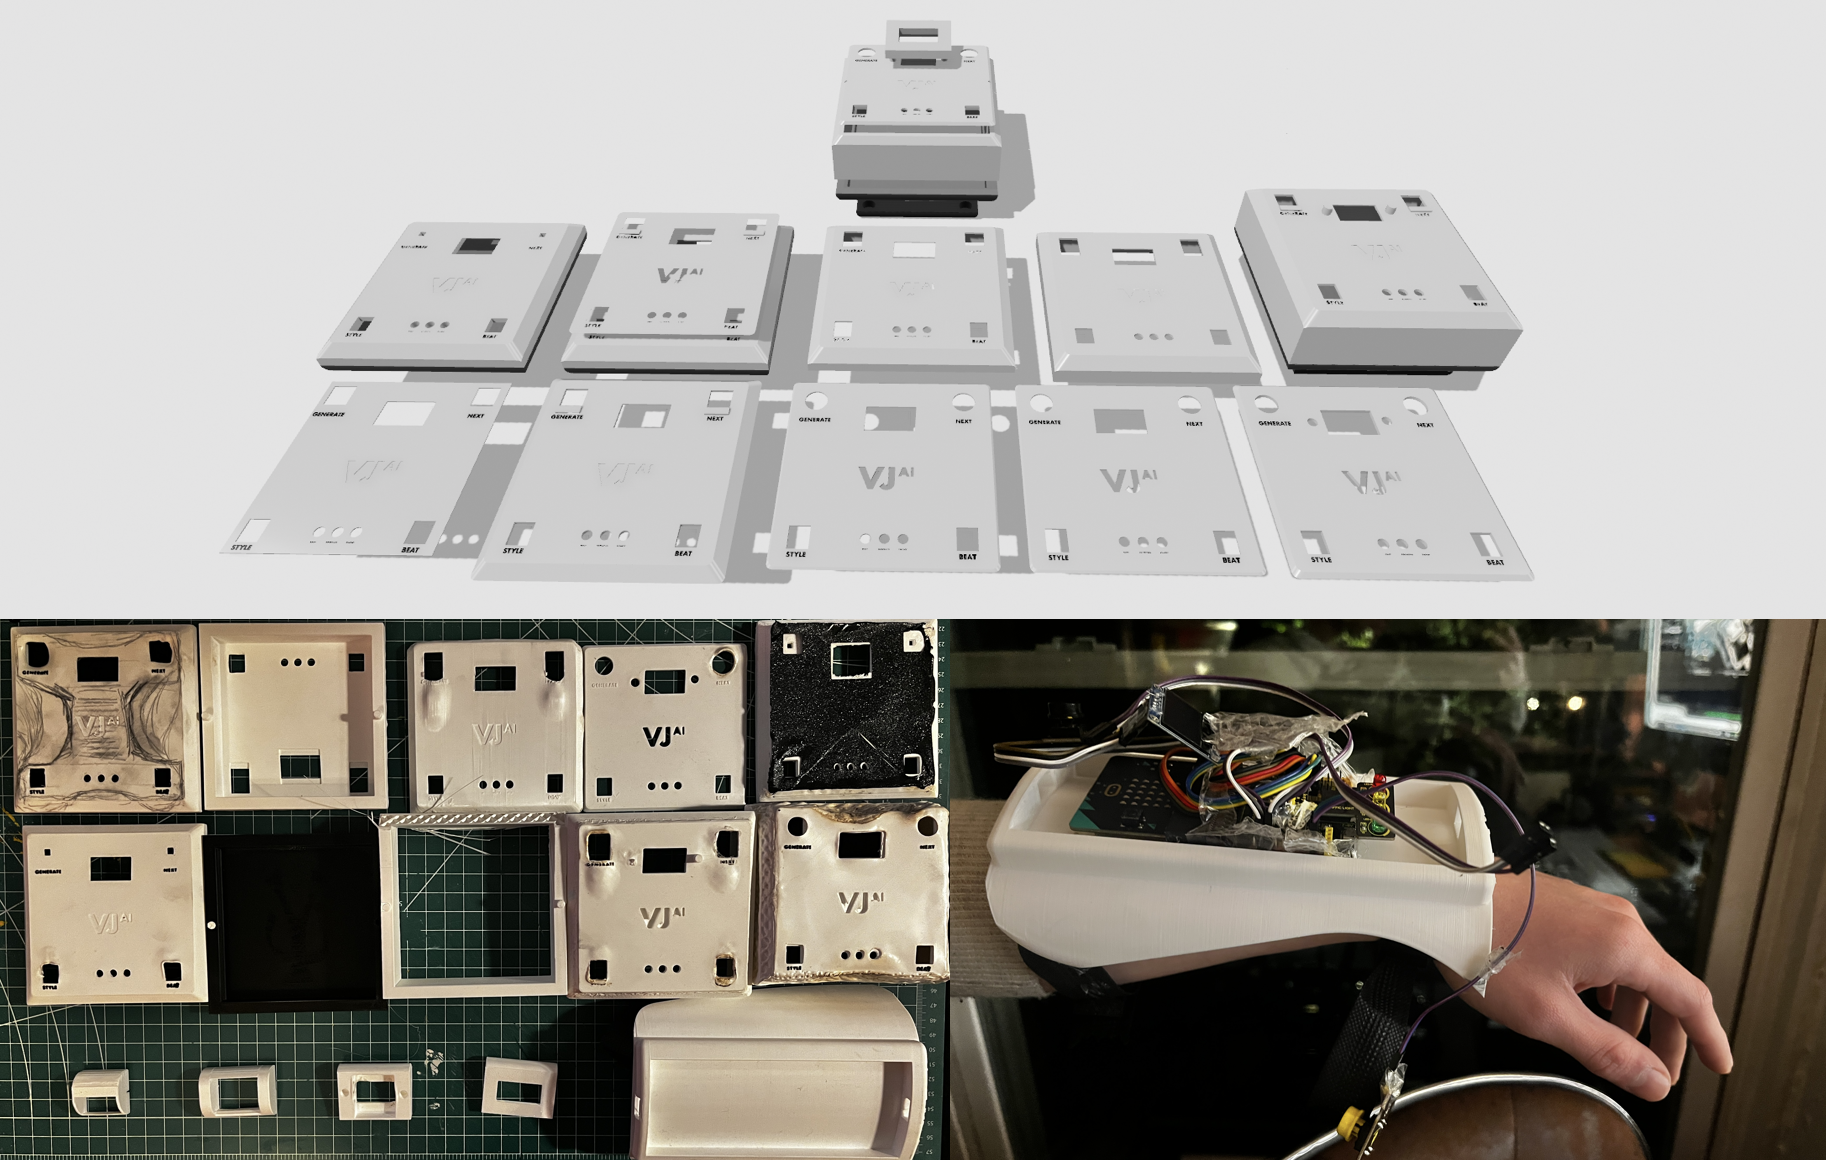
Product Development, Prototyping & Iterations: There were many early failed attempts. The initial bias was to make it as thin as possible, unfortunately due to the wiring that was not possible.
Finding the right tolerances for each of the pieces in the hardware took more time than it should as I had to account for the pins as well and not only the opening and that was only possible to know after printing and testing out many times.
Once the final design was achieved, I explored another way to interact with the idea; An arm-strap solution.
Arm-Strap Render: Visualizing how it might look like on the DJ.
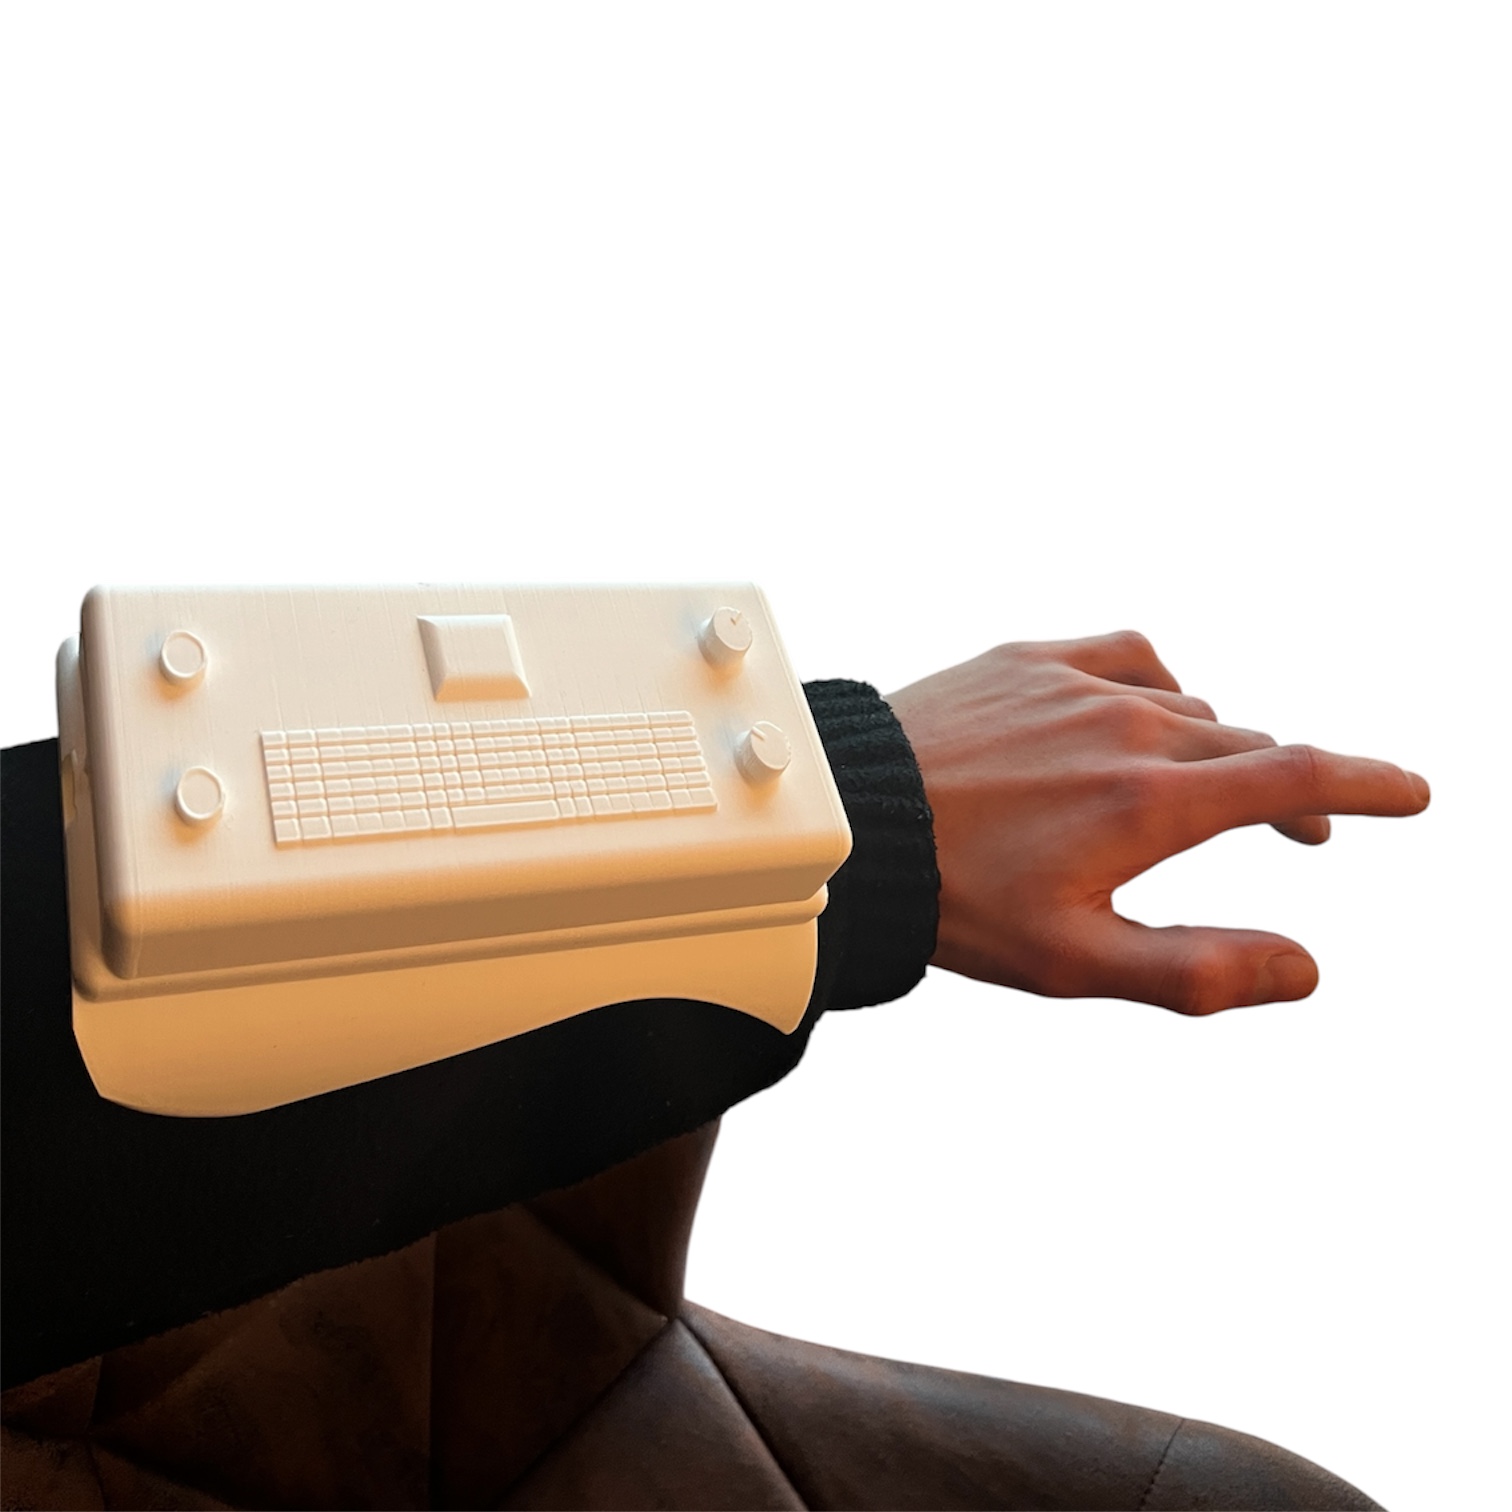
Prototype: Printing it out made me realize that it feels too Sci-fi-esque and after presenting it to some DJ's they preferred the box-like design approach instead of this one.
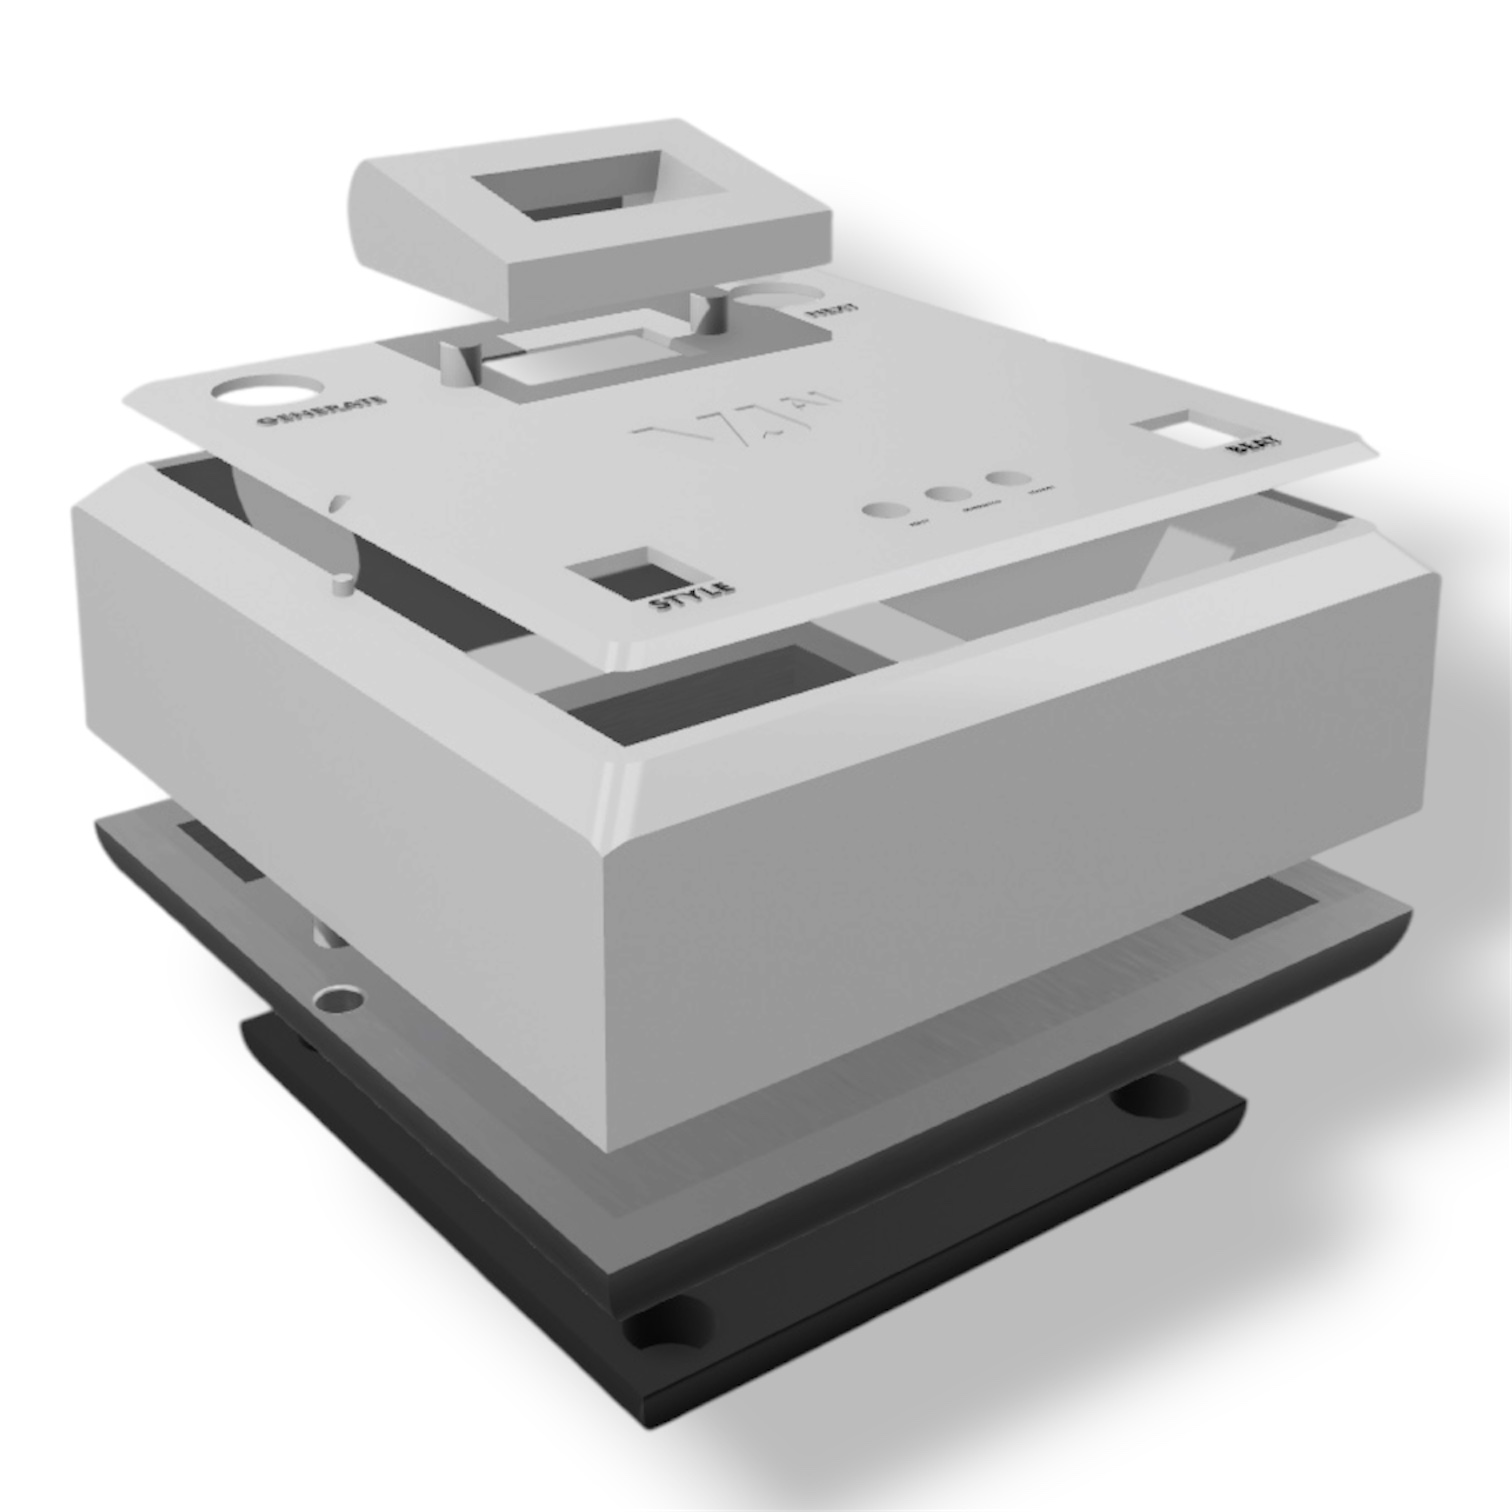
1st Prototype Render: Here I thought I was done, everything fit perfectly here, from tolerances to overall design, so I went ahead and printed it out and attached the hardware to it.
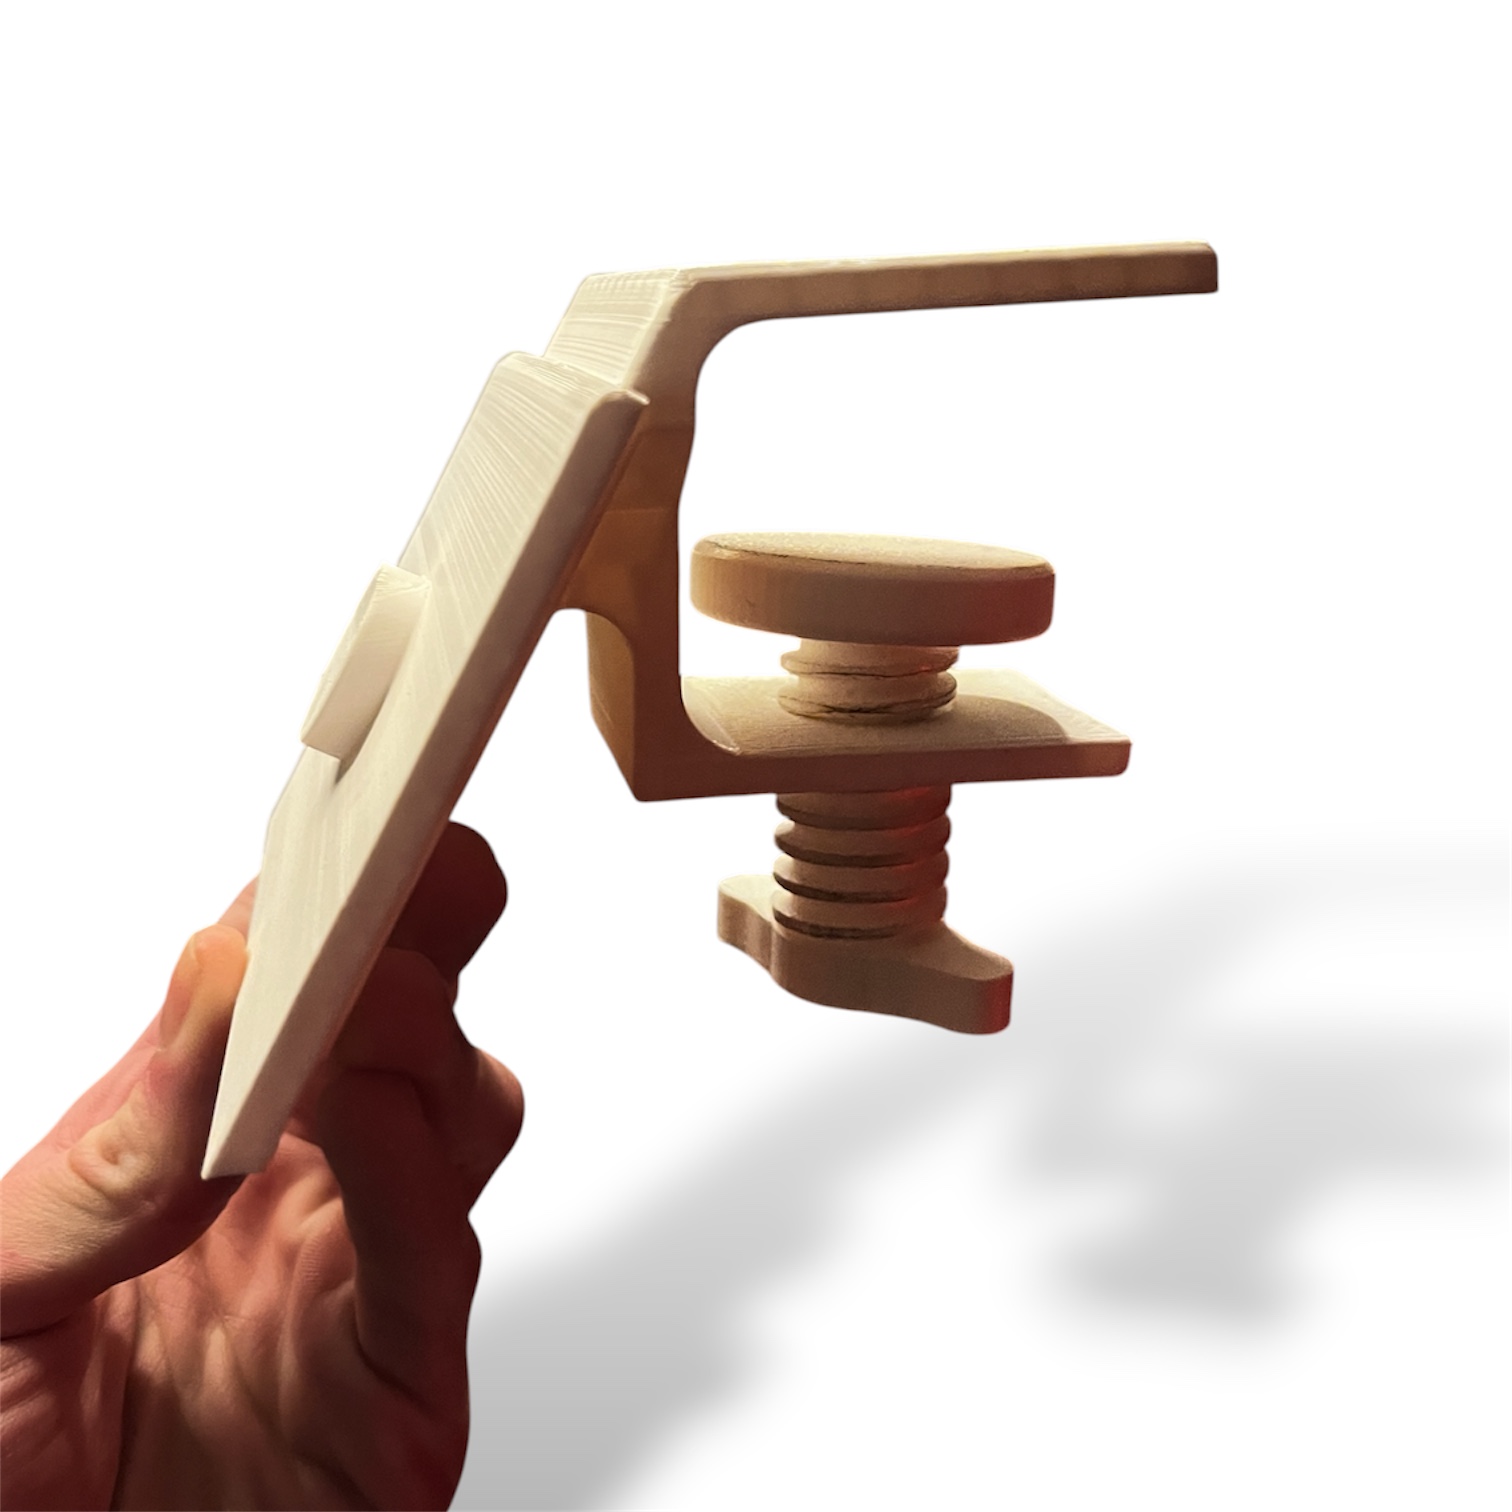
Creating a way for it to not crowd the booth: After talking to DJ's, they preferred if it could sit somewhere away from the booth, as the CDJ's and controllers take so much space.
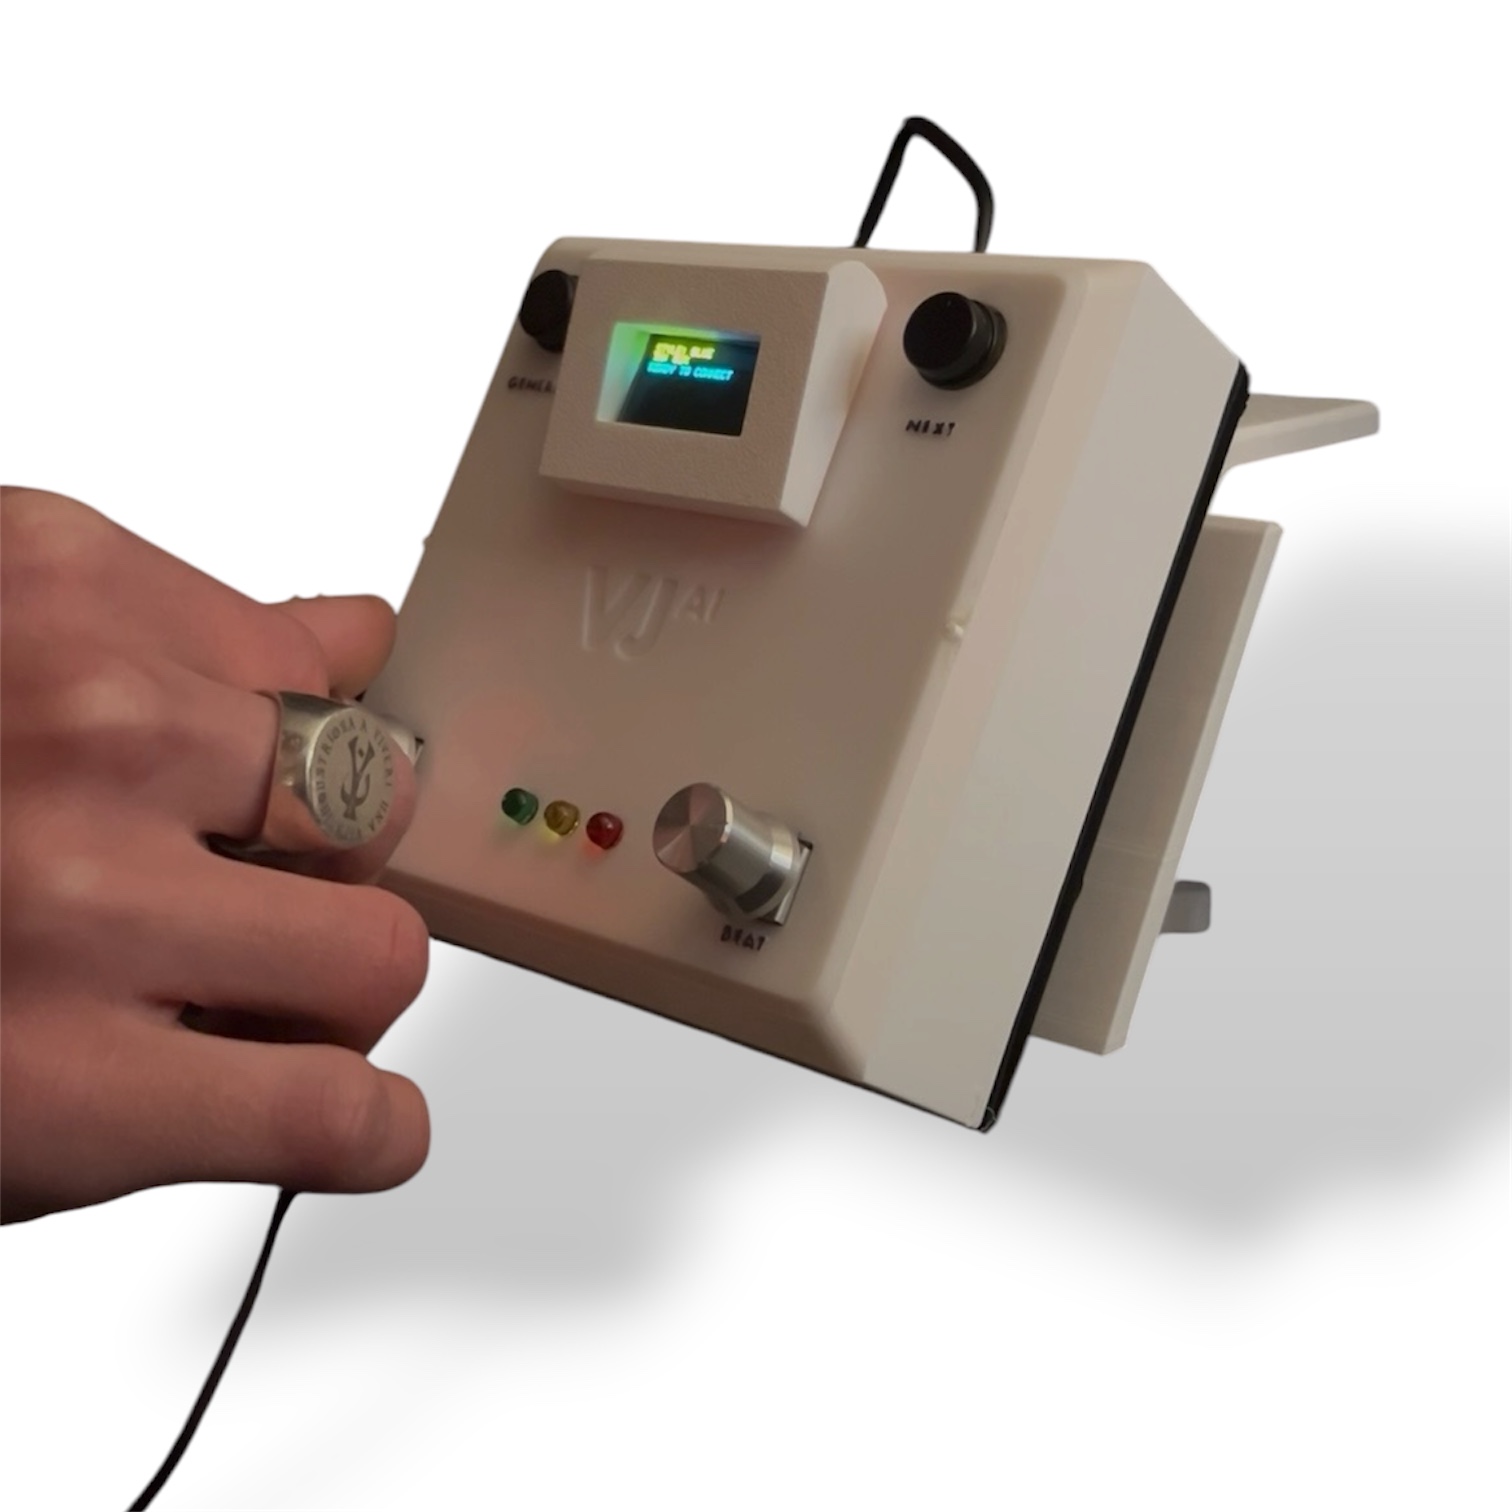
1st Prototype Testing: After printing it out and interacting with it, I realized multiple things:
- Visual design language felt too 80's tech and the white felt bland.
- The OLED casing felt too bulky and did not allow the DJ to see at that angle,
- The side snap-fit mechanism was not ideal, as the plastic kept deforming after constant use, eventually widening the gap and not making it fit.
- The angle of the clamp was too steep, I had to raise it by 15 degrees.
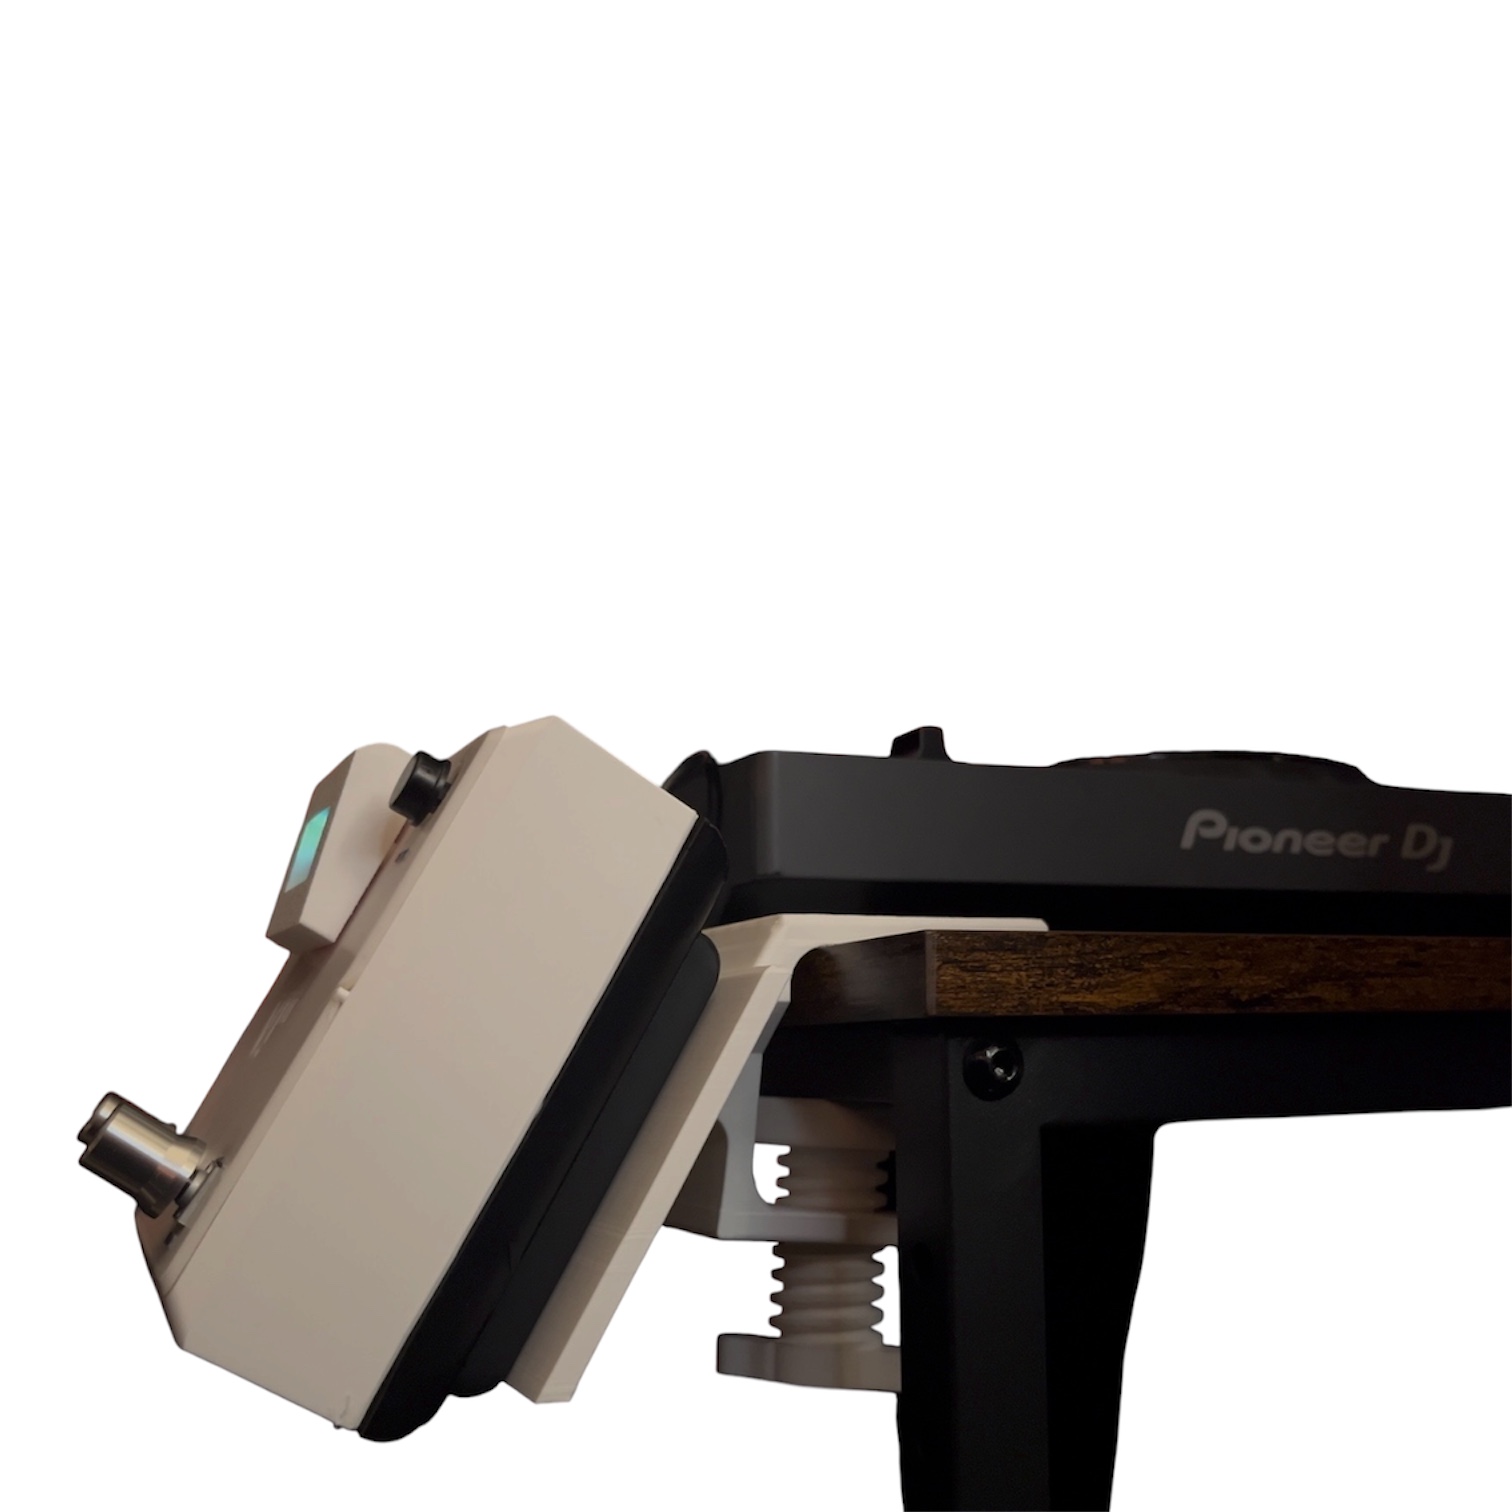
1st Prototype with deck: The clamping mechanism was able to free up space from the booth so all I had to do was to angle it a bit higher.
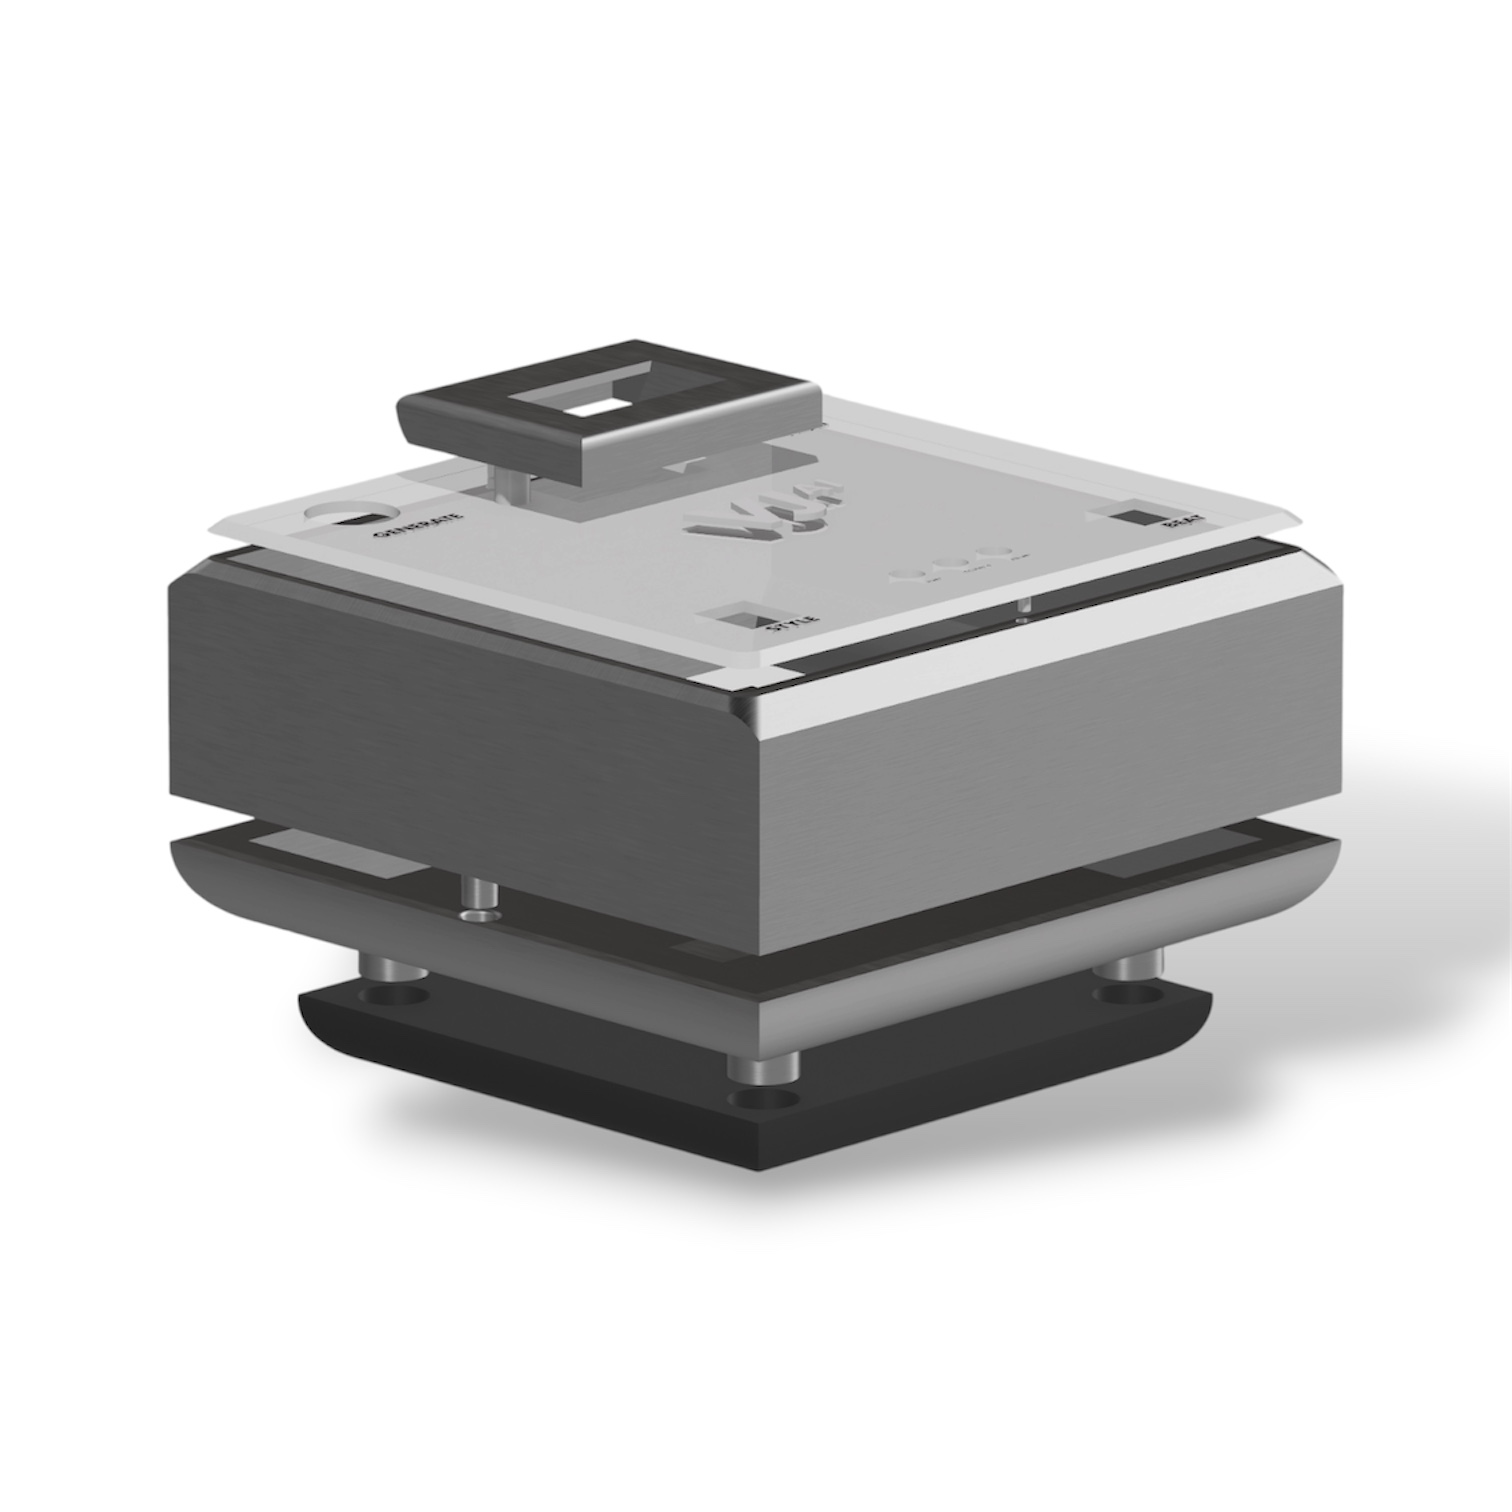
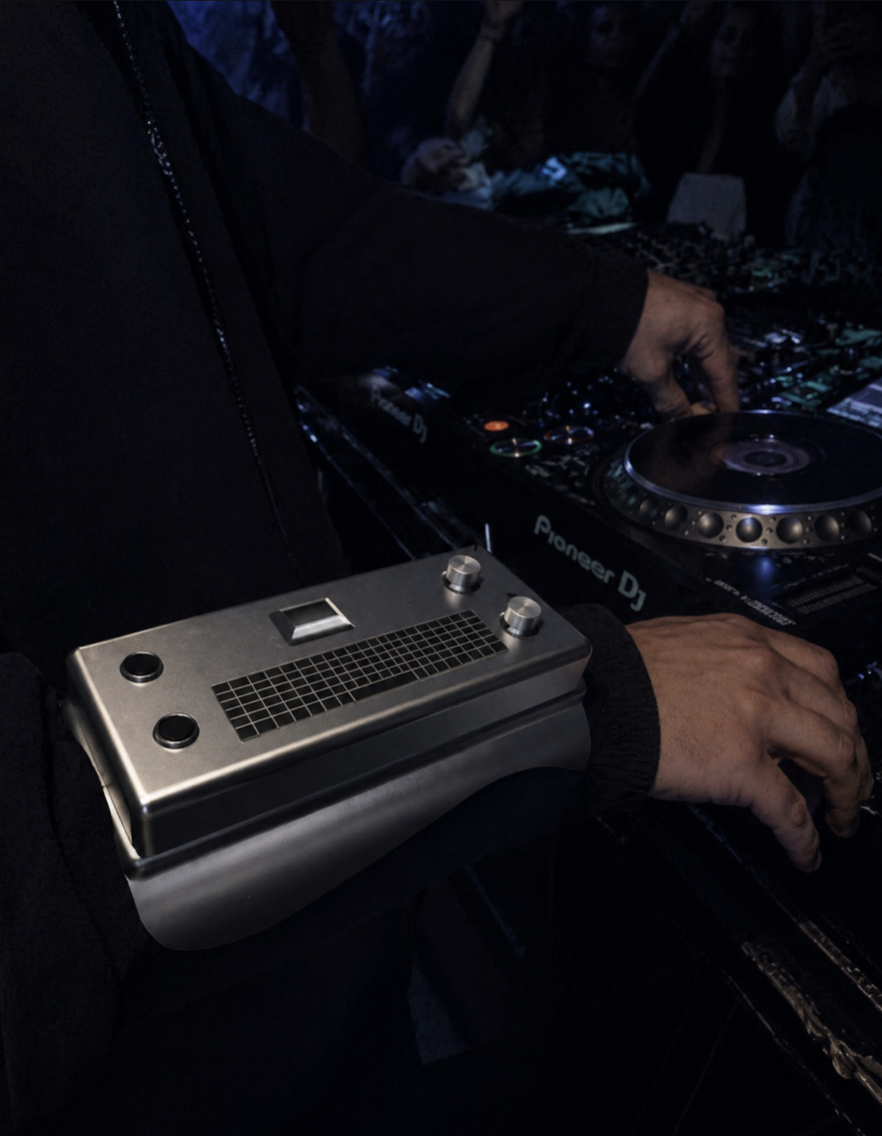
Final Product Render: What changed from the first protoype:
- Visual design langauge should feel finished and premium, planned to finish with an Aluminium feel and transparent design.
- OLED casing is now more flush.
- Snap fit mechanism is not on top and bottom and is not visble and can easily be removed without deformation.
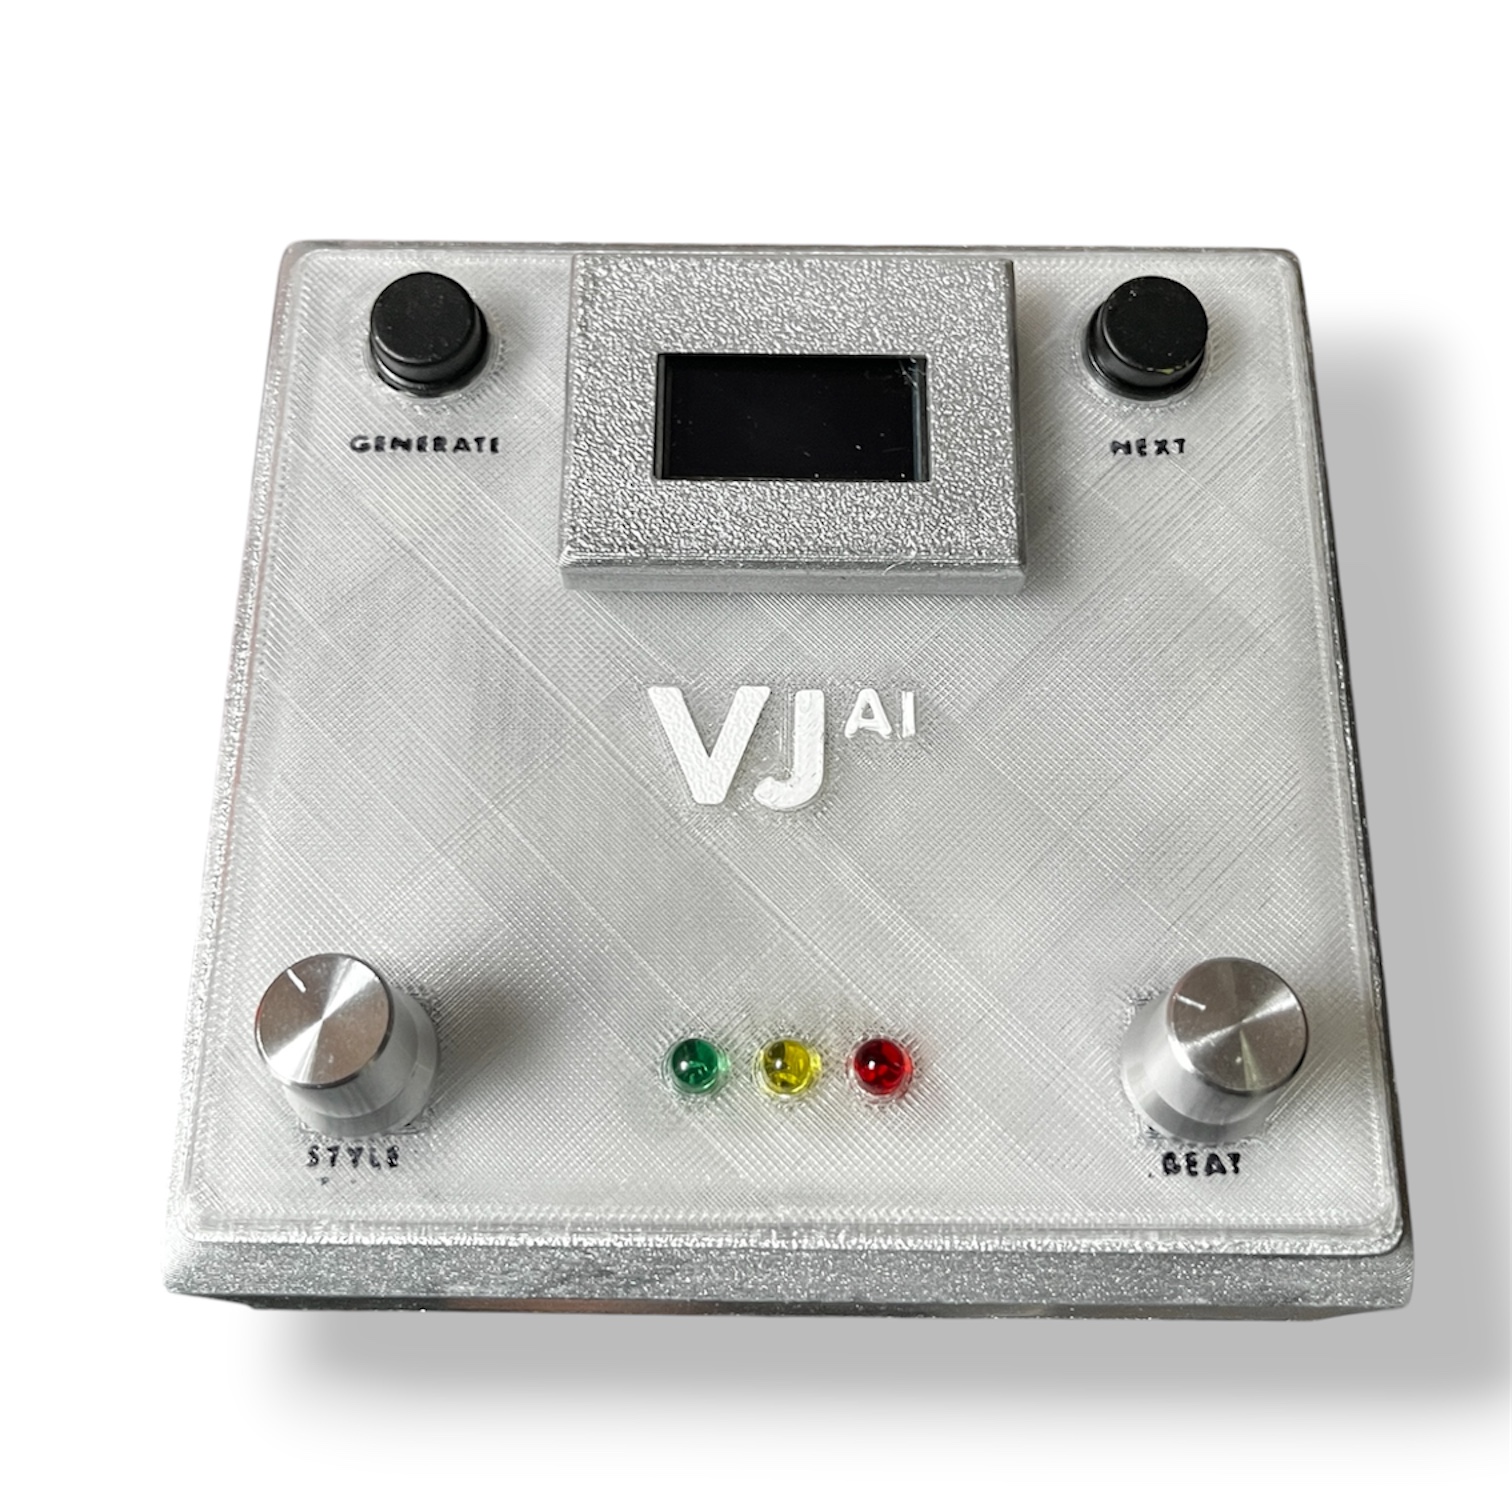
Final Product: Used transparent PLA filament for the top design and finished with metallic spray paint.
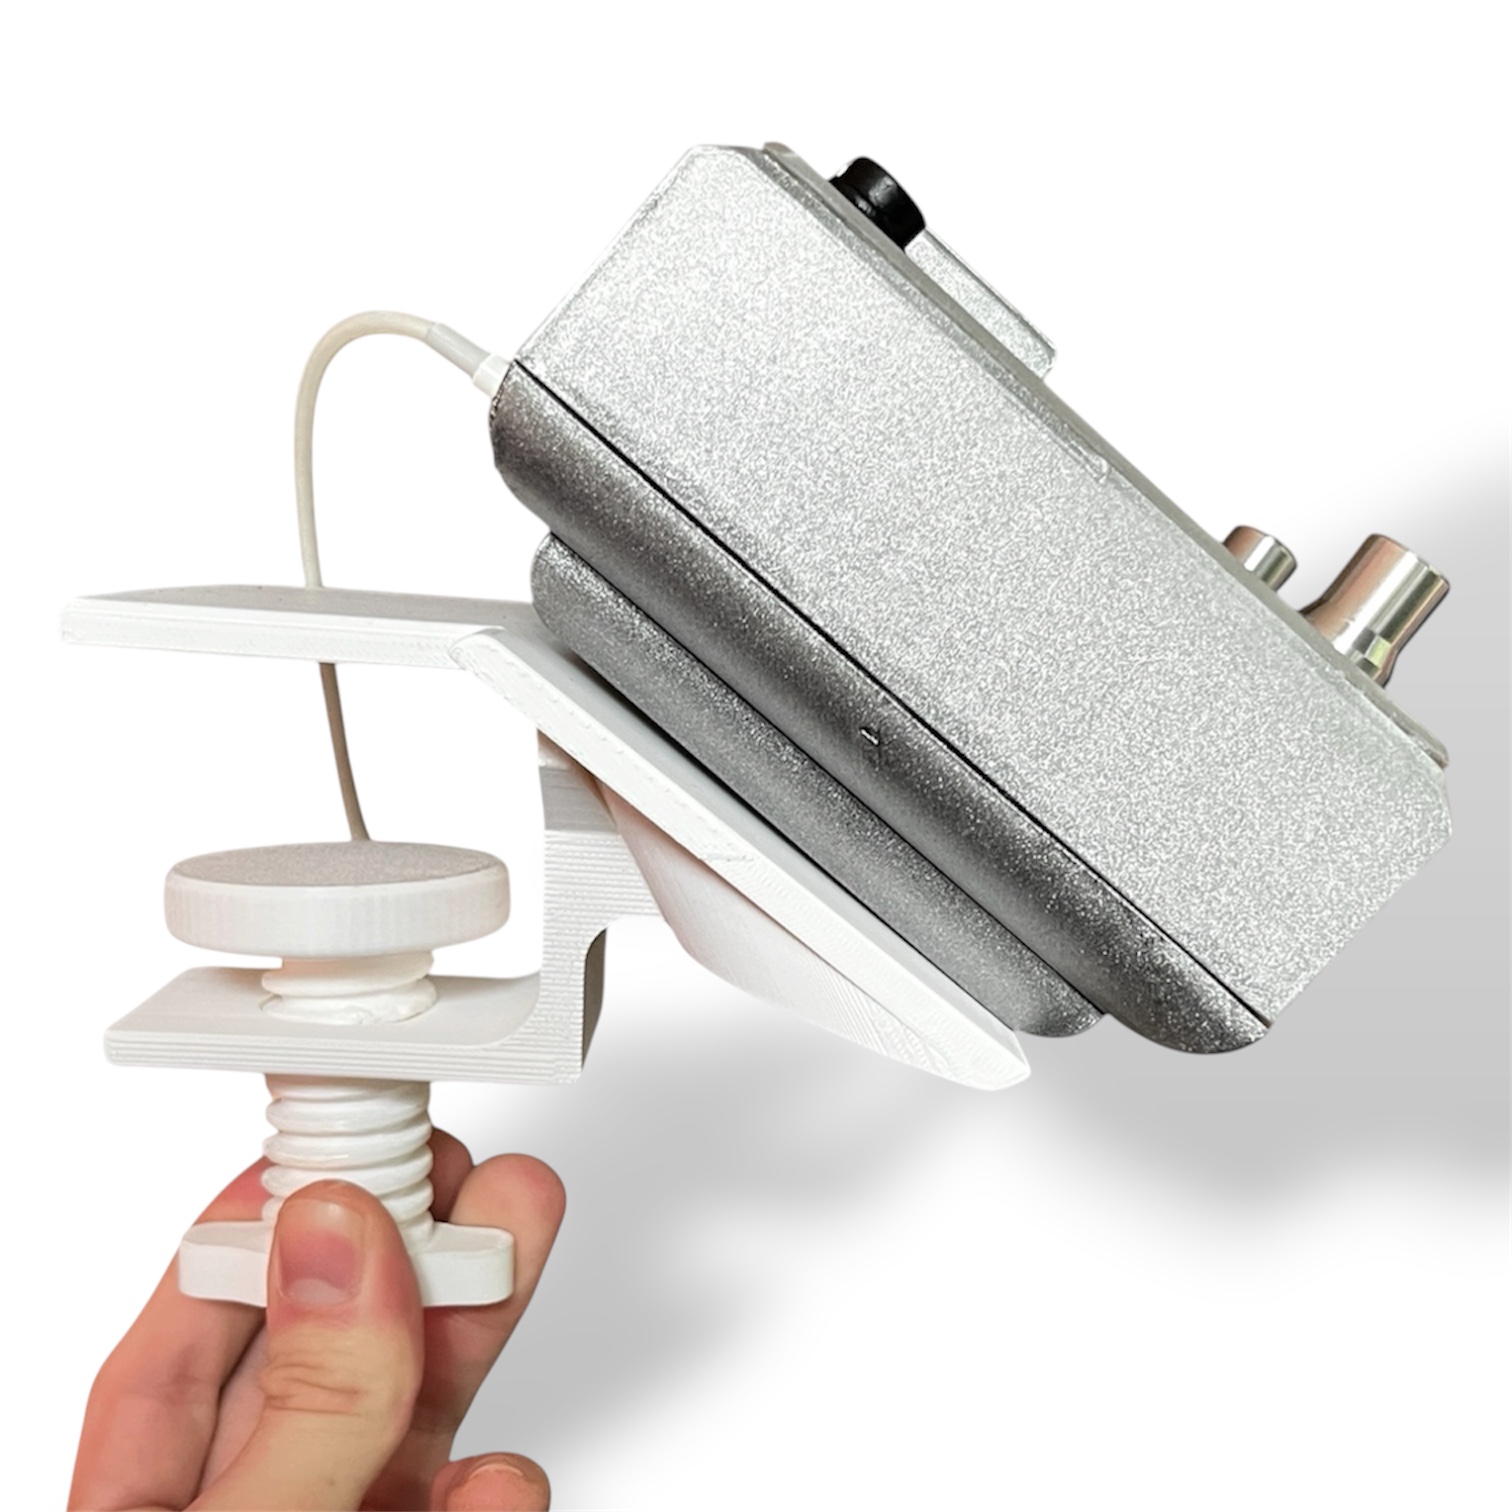
Final Product Side view with clamp: Redesigned the clamp and finished the 3D printed shell off to make it look and feel more premium.